
The Tree command is a useful tool for displaying the directory structure of a file system in a tree-like format. It is commonly used in Unix-based operating systems, including Linux and macOS, to quickly visualize the directory hierarchy of a file system. In this article, we will provide step-by-step instructions on how to install the Tree command on a Linux system, along with some examples of how to use it.
Step 1: Checking if Tree is already installed
Before we proceed with the installation process, we need to check if the Tree command is already installed on our system. To do this, we can use the following command:
tree --version
If Tree is already installed, this command will display the version number of the Tree package installed on our system. If it is not installed, we will get an error message indicating that the Tree command is not found.
Step 2: Installing Tree on Ubuntu/Debian
If the Tree command is not already installed on our system, we can install it using the package manager. In Ubuntu/Debian, we can use the following command to install the Tree package:
sudo apt-get install tree
This will download and install the Tree package along with its dependencies. Once the installation is complete, we can check the version of the Tree command using the tree --version command.
Step 3: Installing Tree on CentOS/RHEL
In CentOS/RHEL, we can install the Tree command using the yum package manager. The following command can be used to install the Tree package:
sudo yum install tree
This will download and install the Tree package along with its dependencies. Once the installation is complete, we can check the version of the Tree command using the tree --version command.
Step 4: Installing Tree on macOS
On macOS, we can install the Tree command using Homebrew, a package manager for macOS. If Homebrew is not installed on our system, we can install it using the following command:
/bin/bash -c "$(curl -fsSL https://raw.githubusercontent.com/Homebrew/install/HEAD/install.sh)"
Once Homebrew is installed, we can use the following command to install the Tree package:
brew install tree
This will download and install the Tree package along with its dependencies. Once the installation is complete, we can check the version of the Tree command using the tree --version command.
Step 5: Using the Tree Command
Once the Tree command is installed on our system, we can use it to display the directory structure of a file system. The basic syntax of the Tree command is as follows:
tree [options] [directory]
Here, [options] refers to any command-line options that we want to use, and [directory] refers to the directory whose directory structure we want to display. If we do not specify a directory, the Tree command will display the directory structure of the current directory.
Example 1: Displaying the Directory Structure of the Current Directory
To display the directory structure of the current directory, we can simply run the Tree command without any arguments:
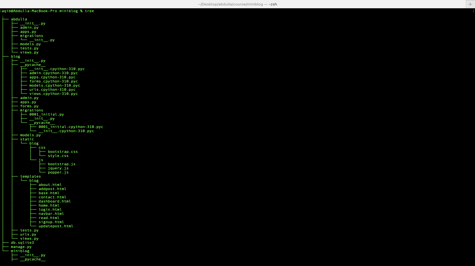
tree
This will display the directory structure of the current directory in a tree-like format.
I have seen the tree of the Django Project.

Example 2: Displaying the Directory Structure of a Specific Directory
To display the directory structure of a specific directory, we need to specify the directory path as an argument to the Tree command. For example, to display the directory structure of the /etc directory, we can run the following command:
tree /etc
Example 3: Displaying the Directory Structure with Custom Options
The Tree command provides several options that we can use to customize the output. Here are some of the most commonly used options:
-d: Display directories only, not files.-L level: Limit the display depth to the specified level.-a: Display hidden files and directories.-p: Display the full path of each file and directory.-I pattern: Exclude files and directories that match the specified pattern.
For example, to display the directory structure of the current directory, including hidden files and directories, but excluding directories named node_modules, we can run the following command:
tree -a -I 'node_modules'
This will display the directory structure of the current directory in a tree-like format, including hidden files and directories but excluding directories named node_modules.
Conclusion
The Tree command is a useful tool for visualizing the directory structure of a file system in a tree-like format. It is easy to install on most Linux and macOS systems and provides several options that we can use to customize the output. By following the steps outlined in this article, you should now be able to install the Tree command on your system and use it to display the directory structure of any directory on your file system.