
Django is a popular web framework used for building robust and scalable web applications. Allauth is a third-party package for Django that allows you to easily integrate social authentication with popular providers like Facebook, Google, Github, and Twitter. In this tutorial, we will go through the step-by-step process of integrating social login using Django Allauth.
I will initially create Django's default authentication system and then add social login functionality to it later. You can skip the basic, go straight to step 8.
Before we begin, make sure you have the following prerequisites installed:
- Python (version 3.x)
- Django (version 3.x or higher)
- Django Allauth (version 0.44.0 or higher)
- requests (version 2.25.1 or higher)
Step 1: Install Django And Django-Allauth
You have to run this command and install Django:
pip install django
And Install the Django-Allauth package:
pip install django-allauth
We will use Django Alloth later, we are just installing it now.
Step 2: Create a Django project and App
Now let's create our project:
django-admin startproject django_allauth
A project named django_allauth will be created, you can do cd django_allauth and go inside it.
cd django_allauth
You have to create an app, you can give any name to the project and app, we have given it the name of user_app.
python manage.py startapp user_app
Now you have to mention this app in your project setting in INSTALLED_APPS
INSTALLED_APPS = [
    "django.contrib.admin",
    "django.contrib.auth",
    "django.contrib.contenttypes",
    "django.contrib.sessions",
    "django.contrib.messages",
    "django.contrib.staticfiles",
    "user_app", # new
]
Step 3: Create Forms for Signup and Login
Django already gives the form but we will inherit that form and modify it a bit according to our own. You do it according to your own.
For this, we have to create a file in our app named forms.py:
# forms.py

from django import forms
from django.contrib.auth.forms import (
    UserCreationForm,
    AuthenticationForm,
    UsernameField,
)
from django.contrib.auth.models import User
from django.utils.translation import gettext, gettext_lazy as _


# Default user creation form
class SignUpForm(UserCreationForm):
    password1 = forms.CharField(
        label="Password", widget=forms.PasswordInput(attrs={"class": "form-control"})
    )
    password2 = forms.CharField(
        label="Confirm Password (again)",
        widget=forms.PasswordInput(attrs={"class": "form-control"}),
    )

    class Meta:
        model = User
        fields = ["username", "first_name", "last_name", "email"]
        labels = {
            "first_name": "First Name",
            "last_name": "Last Name",
            "email": "Email",
        }
        widgets = {
            "username": forms.TextInput(attrs={"class": "form-control"}),
            "first_name": forms.TextInput(attrs={"class": "form-control"}),
            "last_name": forms.TextInput(attrs={"class": "form-control"}),
            "email": forms.EmailInput(attrs={"class": "form-control"}),
        }


# Default authentication form
class LoginForm(AuthenticationForm):
    username = UsernameField(
        widget=forms.TextInput(attrs={"autofocus": True, "class": "form-control"})
    )
    password = forms.CharField(
        label=_("Password"),
        strip=False,
        widget=forms.PasswordInput(
            attrs={"autocomplete": "current-password", "class": "form-control"}
        ),
    )
To handle these two forms, we will write our views. But we will write three extra views, one for our home page, one for the user's dashboard and one to log out of the user.
Step 4: Create Views
To write the logic of the views, we will have a file named views.py inside our app, and we have to write this code in it:
from django.shortcuts import render, HttpResponseRedirect
from .forms import SignUpForm, LoginForm
from django.contrib.auth import authenticate, login, logout
from django.contrib.auth.decorators import login_required
from django.contrib import messages

# Create your views here.

# Home page
@login_required
def home(request):
    return render(request, "home.html")


# Dashboard
def dashboard(request):
    if request.user.is_authenticated:
        user = request.user
        full_name = user.get_full_name()
        return render(
            request,
            "dashboard.html",
            {"full_name": full_name},
        )
    else:
        return HttpResponseRedirect("/login/")


# Sigup
def user_signup(request):
    if not request.user.is_authenticated:
        if request.method == "POST":
            form = SignUpForm(request.POST)
            if form.is_valid():
                form.save()
                messages.success(
                    request, "Congratulations!! You have become an Author."
                )
                HttpResponseRedirect("/login/")
        else:
            form = SignUpForm()
        return render(request, "signup.html", {"form": form})
    else:
        return HttpResponseRedirect("/dashboard/")


# Login
def user_login(request):
    if not request.user.is_authenticated:
        if request.method == "POST":
            form = LoginForm(request=request, data=request.POST)
            if form.is_valid():
                uname = form.cleaned_data["username"]
                upass = form.cleaned_data["password"]
                user = authenticate(username=uname, password=upass)
                if user is not None:
                    login(request, user)
                    messages.success(request, "Logged in Successfully !!")
                    return HttpResponseRedirect("/dashboard/")
        else:
            form = LoginForm()
        return render(request, "login.html", {"form": form})
    else:
        return HttpResponseRedirect("/dashboard/")


# Logout
def user_logout(request):
    logout(request)
    return HttpResponseRedirect("/login/")
Which function is for what?
-
Home view: This view requires the user to be authenticated (i.e., logged in) to access the home page. If the user is authenticated, the view renders the "home.html" template. If the user is not authenticated, the view redirects the user to the login page. This view is decorated with the @login_required decorator, which is provided by Django's authentication framework. This decorator ensures that the view can only be accessed by authenticated users.
- Dashboard view: This view shows the dashboard page for an authenticated user. If the user is authenticated, the view renders the "dashboard.html" template and passes the user's full name as a context variable. If the user is not authenticated, the view redirects the user to the login page.
-
Signup view: This view handles the user signup functionality. If the request method is POST and the form is valid, the view saves the user data and redirects the user to the login page with a success message. If the request method is GET, the view renders the "signup.html" template with a blank form. The view uses Django's built-in UserCreationForm to handle the form processing and validation.
-
Login view: This view handles the user login functionality. If the user is not authenticated and the request method is POST, the view validates the form data and logs the user in if the data is valid. If the user is already authenticated, the view redirects the user to the dashboard page. If the request method is GET, the view renders the "login.html" template with a blank form. The view uses a custom LoginForm class to handle the form processing and validation. This class inherits from Django's built-in AuthenticationForm and adds additional fields for styling purposes.
- Logout view: This view logs the user out and redirects the user to the login page. The view uses Django's built-in logout() function to log the user out.
We have used
@login_requireddecorator on home view, for that we have to give login url in our settings too.# settings.py LOGIN_URL = "/login/"
This code also uses Django's built-in messages framework to display success messages after the user has signed up or logged in. The messages.success() function is called with the request object and the message to be displayed. The messages are then displayed on the next page the user visits. For example, if the user successfully signs up, they will be redirected to the login page and a success message will be displayed.
Step 5: Create Templates
We have mentioned 4 templates in our views, we will write them all. For this, we have to create a directory called templates within our user_app. And you have to create your template inside it like this tempales/home.html.
home.html
<!DOCTYPE html>
<html lang="en">
{% load static %}
<head>
    <meta charset="UTF-8">
    <meta http-equiv="X-UA-Compatible" content="IE=edge">
    <meta name="viewport" content="width=device-width, initial-scale=1.0">
    <title>All Auth</title>
    <!-- Font Awesome -->
    <link
    href="https://cdnjs.cloudflare.com/ajax/libs/font-awesome/6.0.0/css/all.min.css"
    rel="stylesheet"
    />
    <!-- Google Fonts -->
    <link
    href="https://fonts.googleapis.com/css?family=Roboto:300,400,500,700&display=swap"
    rel="stylesheet"
    />
    <!-- MDB -->
    <link
    href="https://cdnjs.cloudflare.com/ajax/libs/mdb-ui-kit/6.2.0/mdb.min.css"
    rel="stylesheet"
    />
</head>
<body>


    <!-- Navbar -->
<nav style="background-color: #474747;" class="navbar navbar-expand-lg navbar-dark">
    <!-- Container wrapper -->
    <div class="container-fluid my-2">
      <!-- Navbar brand -->
      <a class="navbar-brand" href="{% url 'home' %}">Django All Auth</a>

      <!-- Toggle button -->
      <button
        class="navbar-toggler"
        type="button"
        data-mdb-toggle="collapse"
        data-mdb-target="#navbarSupportedContent"
        aria-controls="navbarSupportedContent"
        aria-expanded="false"
        aria-label="Toggle navigation"
      >
        <i class="fas fa-bars"></i>
      </button>

      <!-- Collapsible wrapper -->
      <div class="collapse navbar-collapse" id="navbarSupportedContent">
        <!-- Left links -->
        <ul class="navbar-nav me-auto mb-2 mb-lg-0">
          <li class="nav-item">
            <a class="nav-link active" aria-current="page" href="{% url 'home' %}">Home</a>
          </li>
          {% if request.user.is_authenticated %}
          <li class="nav-item">
            <a class="nav-link" href="{% url 'dashboard' %}">Dashboard</a>
          </li>
          {% else %}
          <li class="nav-item">
              <a class="nav-link" href="{% url 'signup' %}">Signup</a>
            </li>
            <li class="nav-item">
                <a class="nav-link" href="{% url 'login' %}">Login</a>
            </li>
            {% endif %}
        </ul>
        <!-- Left links -->
      </div>
      <!-- Collapsible wrapper -->
    </div>
    <!-- Container wrapper -->
  </nav>
  <!-- Navbar -->

  {% if messages %}
  {% for message in messages %}
  <p class="alert alert-dark mx-4 mt-3">{{message}}</p>
  {% endfor %}
  {% endif %}

  {% block content %}

  <div class="container">
  <div class="accordion mt-4" id="accordionExample">
      <h1>Home Page</h1>
    <div class="accordion-item">
      <h2 class="accordion-header">
        <button class="accordion-button" type="button" data-bs-toggle="collapse" data-bs-target="#collapseOne" aria-expanded="true" aria-controls="collapseOne">
          Accordion Item #1
        </button>
      </h2>
      <div id="collapseOne" class="accordion-collapse collapse show" data-bs-parent="#accordionExample">
        <div class="accordion-body">
          <strong>This is the first item's accordion body.</strong> It is shown by default, until the collapse plugin adds the appropriate classes that we use to style each element. These classes control the overall appearance, as well as the showing and hiding via CSS transitions. You can modify any of this with custom CSS or overriding our default variables. It's also worth noting that just about any HTML can go within the <code>.accordion-body</code>, though the transition does limit overflow.
        </div>
      </div>
    </div>
    <div class="accordion-item">
      <h2 class="accordion-header">
        <button class="accordion-button collapsed" type="button" data-bs-toggle="collapse" data-bs-target="#collapseTwo" aria-expanded="false" aria-controls="collapseTwo">
          Accordion Item #2
        </button>
      </h2>
      <div id="collapseTwo" class="accordion-collapse collapse" data-bs-parent="#accordionExample">
        <div class="accordion-body">
          <strong>This is the second item's accordion body.</strong> It is hidden by default, until the collapse plugin adds the appropriate classes that we use to style each element. These classes control the overall appearance, as well as the showing and hiding via CSS transitions. You can modify any of this with custom CSS or overriding our default variables. It's also worth noting that just about any HTML can go within the <code>.accordion-body</code>, though the transition does limit overflow.
        </div>
      </div>
    </div>
    <div class="accordion-item">
      <h2 class="accordion-header">
        <button class="accordion-button collapsed" type="button" data-bs-toggle="collapse" data-bs-target="#collapseThree" aria-expanded="false" aria-controls="collapseThree">
          Accordion Item #3
        </button>
      </h2>
      <div id="collapseThree" class="accordion-collapse collapse" data-bs-parent="#accordionExample">
        <div class="accordion-body">
          <strong>This is the third item's accordion body.</strong> It is hidden by default, until the collapse plugin adds the appropriate classes that we use to style each element. These classes control the overall appearance, as well as the showing and hiding via CSS transitions. You can modify any of this with custom CSS or overriding our default variables. It's also worth noting that just about any HTML can go within the <code>.accordion-body</code>, though the transition does limit overflow.
        </div>
      </div>
    </div>
  </div>
</div>

  {% endblock content %}


 <!-- MDB -->
<script
type="text/javascript"
src="https://cdnjs.cloudflare.com/ajax/libs/mdb-ui-kit/6.2.0/mdb.min.js"
></script>
</body>
</html>
The code begins with the standard HTML5 document type declaration and defines the language of the document as English. Then it loads the static files like font awesome and MDB (Material Design Bootstrap) for styling the webpage.
The navbar section of the website has been designed with a dark grey background and features a toggle button on the left, which allows the user to expand or collapse the navigation menu. The navigation menu consists of two links: Home and Signup/Login/Dashboard depending upon whether the user is authenticated or not.
If there are any messages generated by the server, they are displayed at the top of the page using the 'messages' framework of Django. The 'block content' tag is used to define the main content of the webpage.
The main content of the webpage consists of an accordion containing three items. Each item has a header and a body and can be collapsed or expanded by clicking on the header. The accordion is defined using Bootstrap's accordion component.
Overall, this code provides a basic structure for creating a website that uses Django All Auth for authentication and styling using Bootstrap. The template can be customized further according to the requirements of the website.
dashboard.html
{% extends "home.html" %}
{% load static %}

{% block content %}

<style>
    .gradient-custom {
/* fallback for old browsers */
background: #343434;

/* Chrome 10-25, Safari 5.1-6 */
background: -webkit-linear-gradient(to right bottom, rgb(41, 41, 41), rgb(126, 123, 123));

/* W3C, IE 10+/ Edge, Firefox 16+, Chrome 26+, Opera 12+, Safari 7+ */
background: linear-gradient(to right bottom, rgb(21, 20, 18), rgb(195, 195, 195))
}
</style>

<div class="row">
    <div class="col-2"></div>
    <div class="col-8 mt-4">
            <div class="container py-5 h-100">
              <div class="row d-flex justify-content-center align-items-center h-100">
                <div class="col col-lg-6 mb-4 mb-lg-0">
                  <div class="card mb-3" style="border-radius: .5rem;">
                    <div class="row g-0">
                      <div class="col-md-4 gradient-custom text-center text-white"
                        style="border-top-left-radius: .5rem; border-bottom-left-radius: .5rem;">
                        <img src="https://mdbcdn.b-cdn.net/img/Photos/new-templates/bootstrap-chat/ava1-bg.webp"
                          alt="Avatar" class="img-fluid my-5" style="width: 80px;" />
                          {% if full_name %}
                          <h5>{{full_name}}</h5>
                          {% else %}
                          <h5>{{request.user}}</h5>
                          {% endif %}
                        <i class="far fa-edit mb-5"></i>
                      </div>
                      <div class="col-md-8">
                        <div class="card-body p-4">
                          <h6>Information</h6>
                          <hr class="mt-0 mb-4">
                          <div class="row pt-1">
                            <div class=" mb-3">
                              <h6>Email</h6>
                              <p class="text-muted">{{request.user.email}}</p>
                            </div>
                          </div>
                          <hr class="mt-0 mb-4">
                          <div class="row pt-1">
                            <div class="col-6 mb-3">
                              <h6>Date joined</h6>
                              <p class="text-muted">{{request.user.date_joined}}</p>
                            </div>
                            <div class="col-6 mb-3">
                              <h6>Last Login</h6>
                              <p class="text-muted">{{request.user.last_login}}</p>
                            </div>
                          </div>
                          <div class="d-flex justify-content-start">
                            <form method="post" action="{% url 'logout' %}">
                                {% csrf_token %}
                                <button type="submit" class="btn btn-dark">Logout</button>
                            </form>
                          </div>
                        </div>
                      </div>
                    </div>
                  </div>
                </div>
              </div>
           </div>
    </div>
    <div class="col-2"></div>
</div>

{% endblock content %}
The file extends a base template called "home.html" and loads static files. The main content is inside a block called "content".
The page has a custom gradient background and a centred card that displays the user's information, such as their email, the date joined, and their last login time. If the user has provided their full name, it will be displayed at the top of the card. Otherwise, their username will be displayed. The card also contains an avatar image and an edit icon.
At the bottom of the card, there is a button to log out the user. The form to perform the logout action uses Django's built-in logout view.
signup.html
{% extends "home.html" %}
{% load static %}

{% block content %}


<div class="row">
    <div class="col-4"></div>
    <div class="col-4 mt-4 card">
        <h3 style="font-family: Georgia, serif; font-size: 40px;" class="text-center my-5">Signup Page</h3>
        <form action="" method="post" novalidate>
          {% csrf_token %}
          {% for fm in form %}
           <div class="form-group mb-2">
           {{fm.label_tag}} {{fm}} <small class="text-warning">{{fm.errors|striptags}}</small>
           </div>
          {% endfor %}
          {% if form.non_field_errors %}
          {% for error in form.non_field_errors %}
          <p class="alert alert-danger my-3">{{error}}</p>
          {% endfor %}
          {% endif %}
          <button type="submit" class="btn btn-dark btn-block mt-4">Signup</button>
         </form>

         <!-- Register buttons -->
        <div class="text-center mt-4 mb-4">
            <p>Already registered? <a class="text-dark" href="{% url 'login' %}"><b>Login</b></a></p>
            <p>or login with:</p>
            <button type="button" class="btn btn-dark btn-floating mx-1">
            <i class="fab fa-facebook-f"></i>
            </button>

            <button type="button" class="btn btn-dark btn-floating mx-1">
            <i class="fab fa-google"></i>
            </button>

            <button type="button" class="btn btn-dark btn-floating mx-1">
            <i class="fab fa-twitter"></i>
            </button>

            <button type="button" class="btn btn-dark btn-floating mx-1">
            <i class="fab fa-github"></i>
            </button>
        </div>
    </div>
    <div class="col-4"></div>
</div>

{% endblock content %}
This is a Django template for a signup page. It extends the "home.html" template and loads the static files. The template has a block for content which contains a form for user registration.
The form is created dynamically using the Django form framework by iterating over the form fields and generating the appropriate HTML. The form fields are rendered with their corresponding labels and error messages (if any). The form is submitted via the HTTP POST method and has a CSRF token to prevent Cross-Site Request Forgery attacks.
There are also social media buttons for signing up using Facebook, Google, Twitter, and GitHub accounts. These buttons are not functional in this template, We will add them in the next steps.
login.html
{% extends "home.html" %}
{% load static %}

{% block content %}


<div class="row">
    <div class="col-4"></div>
    <div class="col-4 mt-4 card">
        <h3 style="font-family: Georgia, serif; font-size: 40px;" class="text-center my-5">Login Page</h3>
        <form action="" method="post" novalidate>
          {% csrf_token %}
          {% for fm in form %}
           <div class="form-group mb-2">
           {{fm.label_tag}} {{fm}} <small class="text-warning">{{fm.errors|striptags}}</small>
           </div>
          {% endfor %}
          {% if form.non_field_errors %}
          {% for error in form.non_field_errors %}
          <p class="alert alert-danger my-3">{{error}}</p>
          {% endfor %}
          {% endif %}
          <button type="submit" class="btn btn-dark btn-block mt-4">login</button>
         </form>

         <!-- Register buttons -->
        <div class="text-center mt-4 mb-4">
            <p>Not a member? <a class="text-dark" href="{% url 'signup' %}"><b>Register</b></a></p>
            <p>or sign up with:</p>
            <button type="button" class="btn btn-dark btn-floating mx-1">
            <i class="fab fa-facebook-f"></i>
            </button>

            <button type="button" class="btn btn-dark btn-floating mx-1">
            <i class="fab fa-google"></i>
            </button>

            <button type="button" class="btn btn-dark btn-floating mx-1">
            <i class="fab fa-twitter"></i>
            </button>

            <button type="button" class="btn btn-dark btn-floating mx-1">
            <i class="fab fa-github"></i>
            </button>
        </div>
    </div>
    <div class="col-4"></div>
</div>

{% endblock content %}
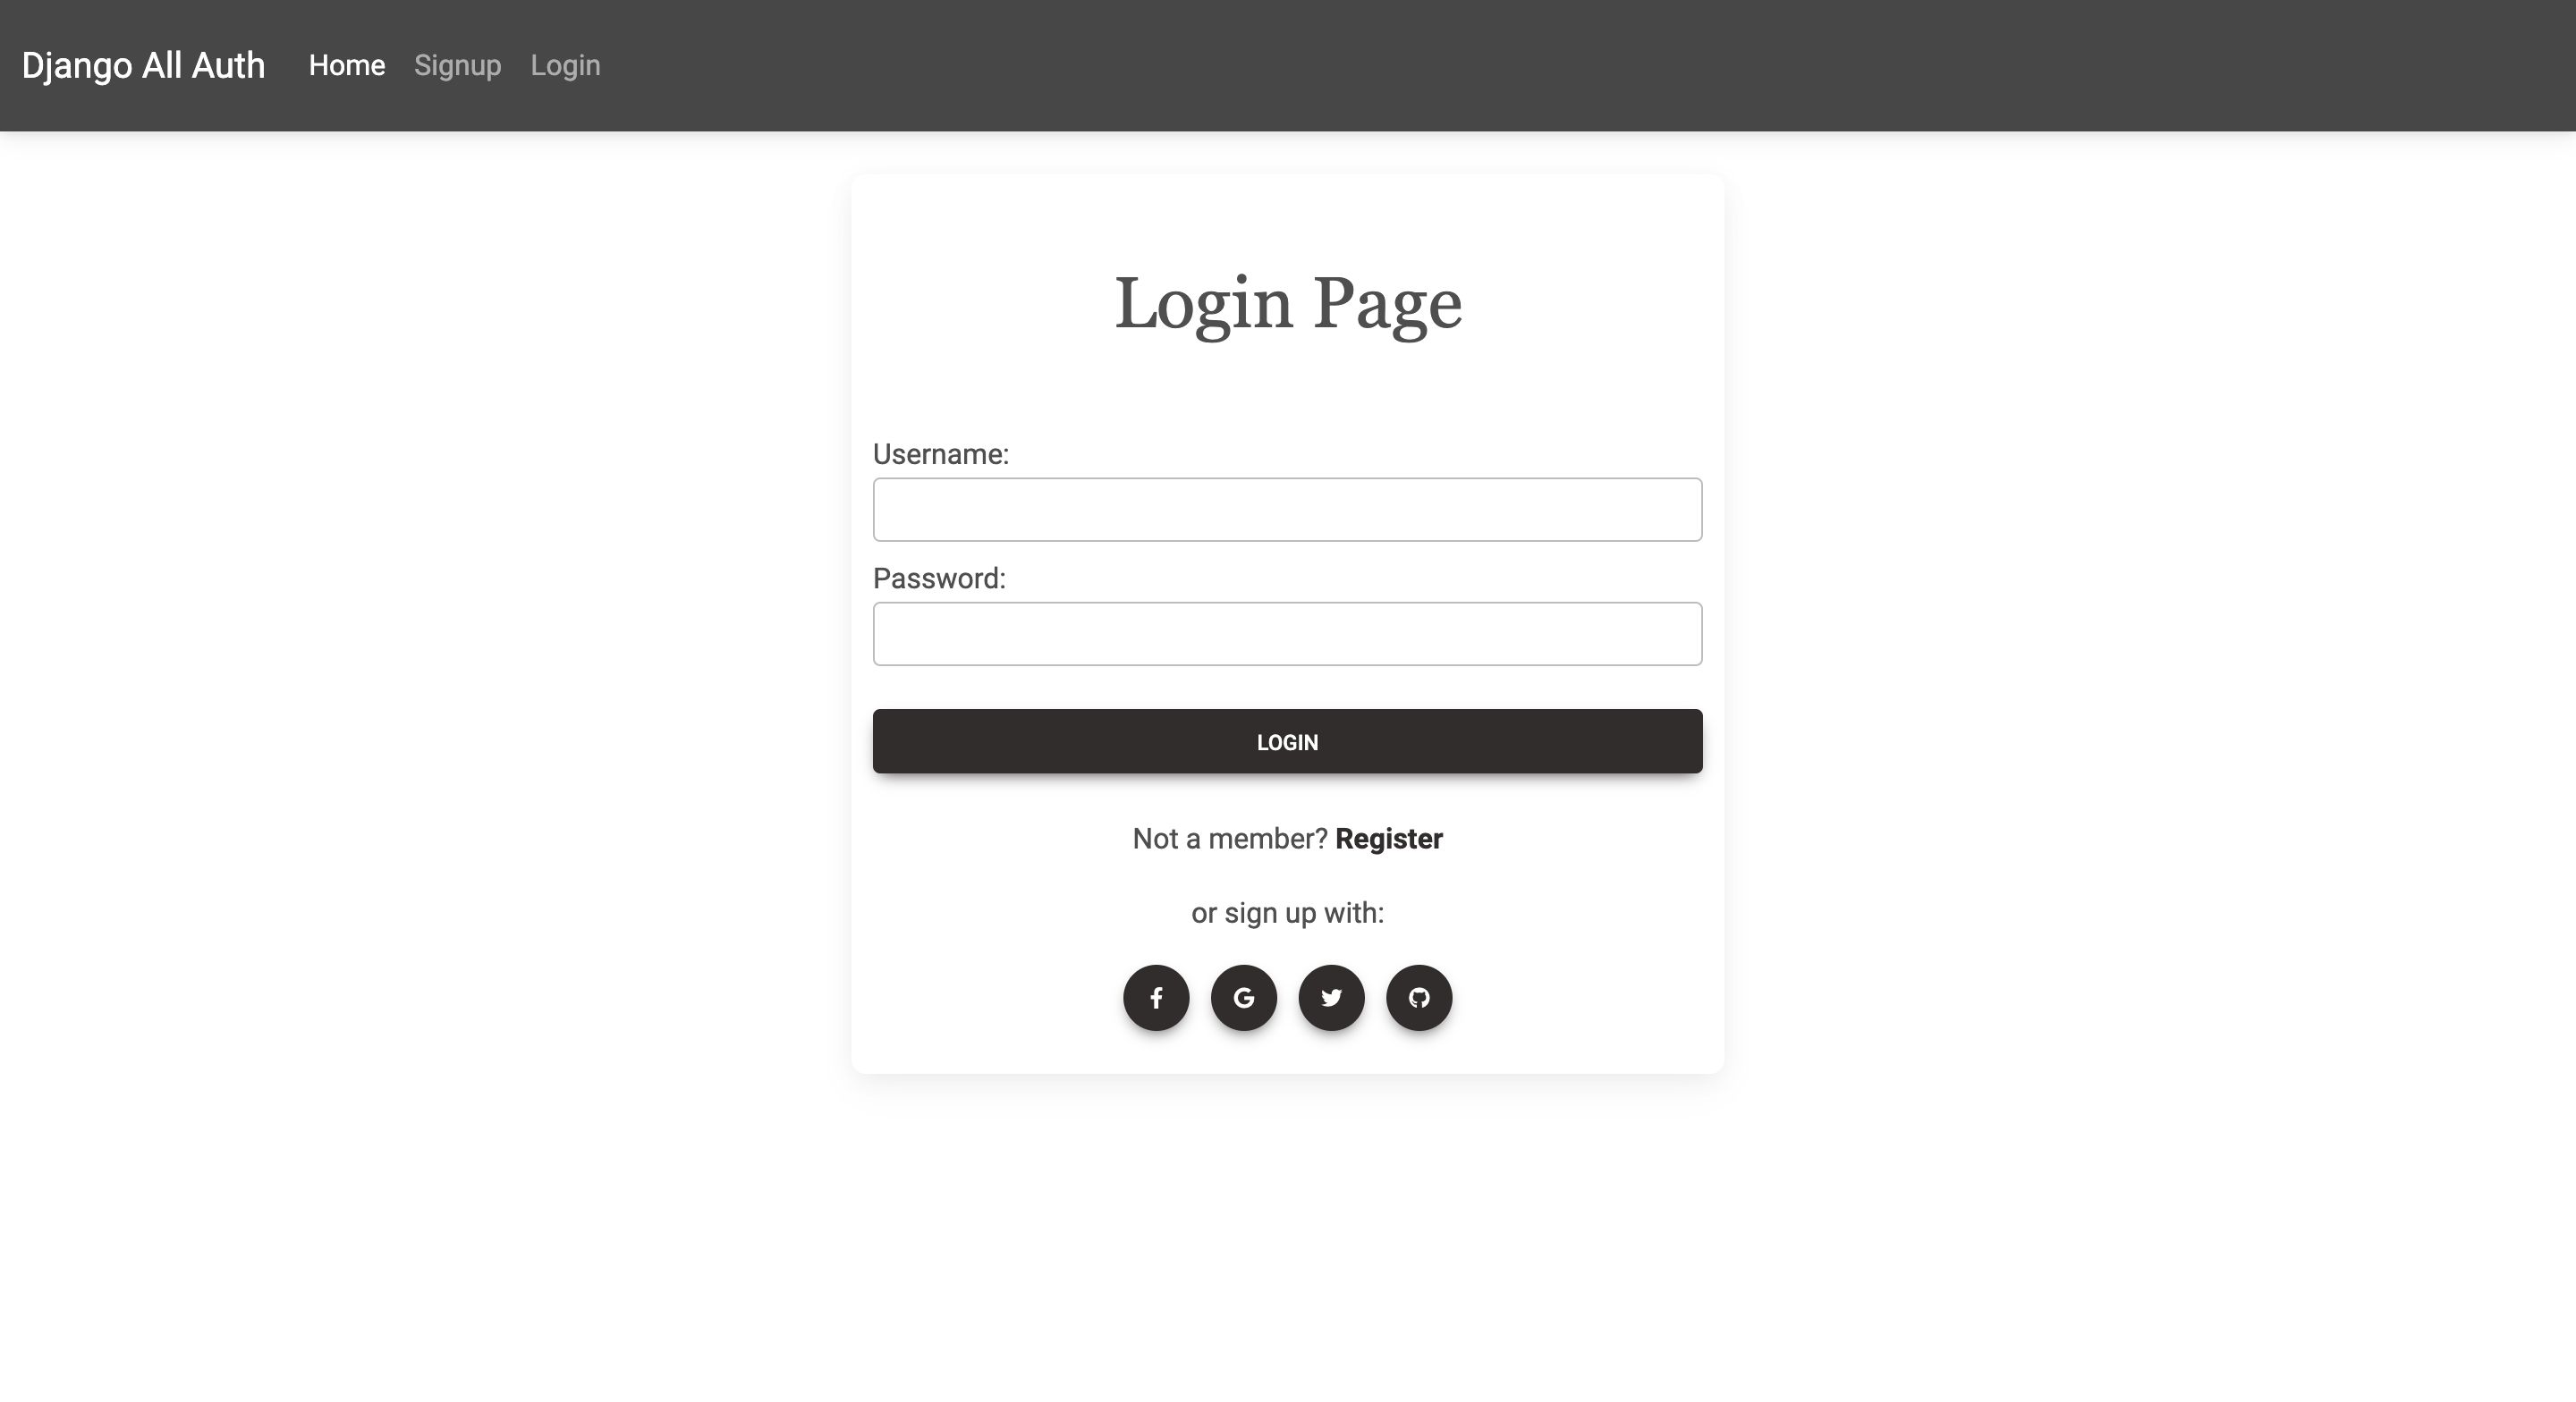
This is a Django template for a login page. It extends a base template named "home.html" and loads static files.
The template contains a form for logging in with fields for username and password. It also includes error messages if the form is not valid and a submit button.
In addition, there are buttons for registering with the website and for logging in using social media accounts such as Facebook, Google, Twitter, and Github.
The "Not a member?" text contains a link that takes the user to the signup page. The link is generated using the Django URL tag with the name "signup".
Step 6: Create URLs
Now we will create URLs for views For that, we have to create a file named urls.py inside our app.
#user_app/urls.py

from django.urls import path
from . import views

urlpatterns = [
    path("", views.home, name="home"),
    path("dashboard/", views.dashboard, name="dashboard"),
    path("login/", views.user_login, name="login"),
    path("signup/", views.user_signup, name="signup"),
    path("logout/", views.user_logout, name="logout"),
]
We will include these URLs in our project URLs.
# django_allauth/urls.py

"""django_allauth URL Configuration

The `urlpatterns` list routes URLs to views. For more information please see:
    https://docs.djangoproject.com/en/4.0/topics/http/urls/
Examples:
Function views
    1. Add an import:  from my_app import views
    2. Add a URL to urlpatterns:  path('', views.home, name='home')
Class-based views
    1. Add an import:  from other_app.views import Home
    2. Add a URL to urlpatterns:  path('', Home.as_view(), name='home')
Including another URLconf
    1. Import the include() function: from django.urls import include, path
    2. Add a URL to urlpatterns:  path('blog/', include('blog.urls'))
"""
from django.contrib import admin
from django.urls import path, include

urlpatterns = [
    path("admin/", admin.site.urls),
    path("", include("user_app.urls")),
]
Our basic authentication system has been created. You can test it.
Step 7: Run the Basic Authentication system
You can also skip this step. We will just test whether everything is working properly or not.
First, we have to run the migrate command:
python manage.py migrate
We also create a super user:
python manage.py createsuperuser
Now we will run our project:
python manage.py runserver
Wow, everything is working fine.


Now let's move on to our main topic
Step 8: Add Django Allauth In the settings
We had already installed it, now we will install Django-Allauth in our project also some settings will have to be changed:
# Application definition

INSTALLED_APPS = [
    "django.contrib.admin",
    "django.contrib.auth",
    "django.contrib.contenttypes",
    "django.contrib.sessions",
    "django.contrib.messages",
    "django.contrib.staticfiles",
    "user_app",
    # The following apps are required:
    "django.contrib.sites",
    # install allauth:
    "allauth",
    "allauth.account",
    "allauth.socialaccount",
    # ... include the providers you want to enable:
    "allauth.socialaccount.providers.google",
    "allauth.socialaccount.providers.facebook",
    "allauth.socialaccount.providers.twitter",
    "allauth.socialaccount.providers.github",
]

SITE_ID = 1  # new

AUTHENTICATION_BACKENDS = [
    # Needed to login by username in Django admin, regardless of `allauth`
    "django.contrib.auth.backends.ModelBackend",
    # `allauth` specific authentication methods, such as login by e-mail
    "allauth.account.auth_backends.AuthenticationBackend",
]

LOGIN_REDIRECT_URL = "/"

ACCOUNT_LOGOUT_ON_GET = True
You have to include its URL in the URL of your project New urls.py will be like this:
# django_allauth/urls.py

"""django_allauth URL Configuration

The `urlpatterns` list routes URLs to views. For more information please see:
    https://docs.djangoproject.com/en/4.0/topics/http/urls/
Examples:
Function views
    1. Add an import:  from my_app import views
    2. Add a URL to urlpatterns:  path('', views.home, name='home')
Class-based views
    1. Add an import:  from other_app.views import Home
    2. Add a URL to urlpatterns:  path('', Home.as_view(), name='home')
Including another URLconf
    1. Import the include() function: from django.urls import include, path
    2. Add a URL to urlpatterns:  path('blog/', include('blog.urls'))
"""
from django.contrib import admin
from django.urls import path, include

urlpatterns = [
    path("admin/", admin.site.urls),
    path("", include("user_app.urls")),
    path("accounts/", include("allauth.urls")),
]
In your Django root execute the command below to create your database tables:
python manage.py migrate
Now start your server, visit your admin pages (e.g. http://localhost:8000/admin/):
You have to go to admin and first add your domain by going to the sites, we will add the text of the local host there.
To allow users to authenticate with social providers like Facebook, Google, GitHub, and Twitter, you need to create API keys for each provider and include them in your admin site.
Step 9: Create and configure the Client ID and Client Secret Key
I will give you Google's exam and do everything else, if there is any issue then message me.
Head over to Google Developer APIs Console and create a new project.

Then, create an app by filling in the OAuth consent screen.
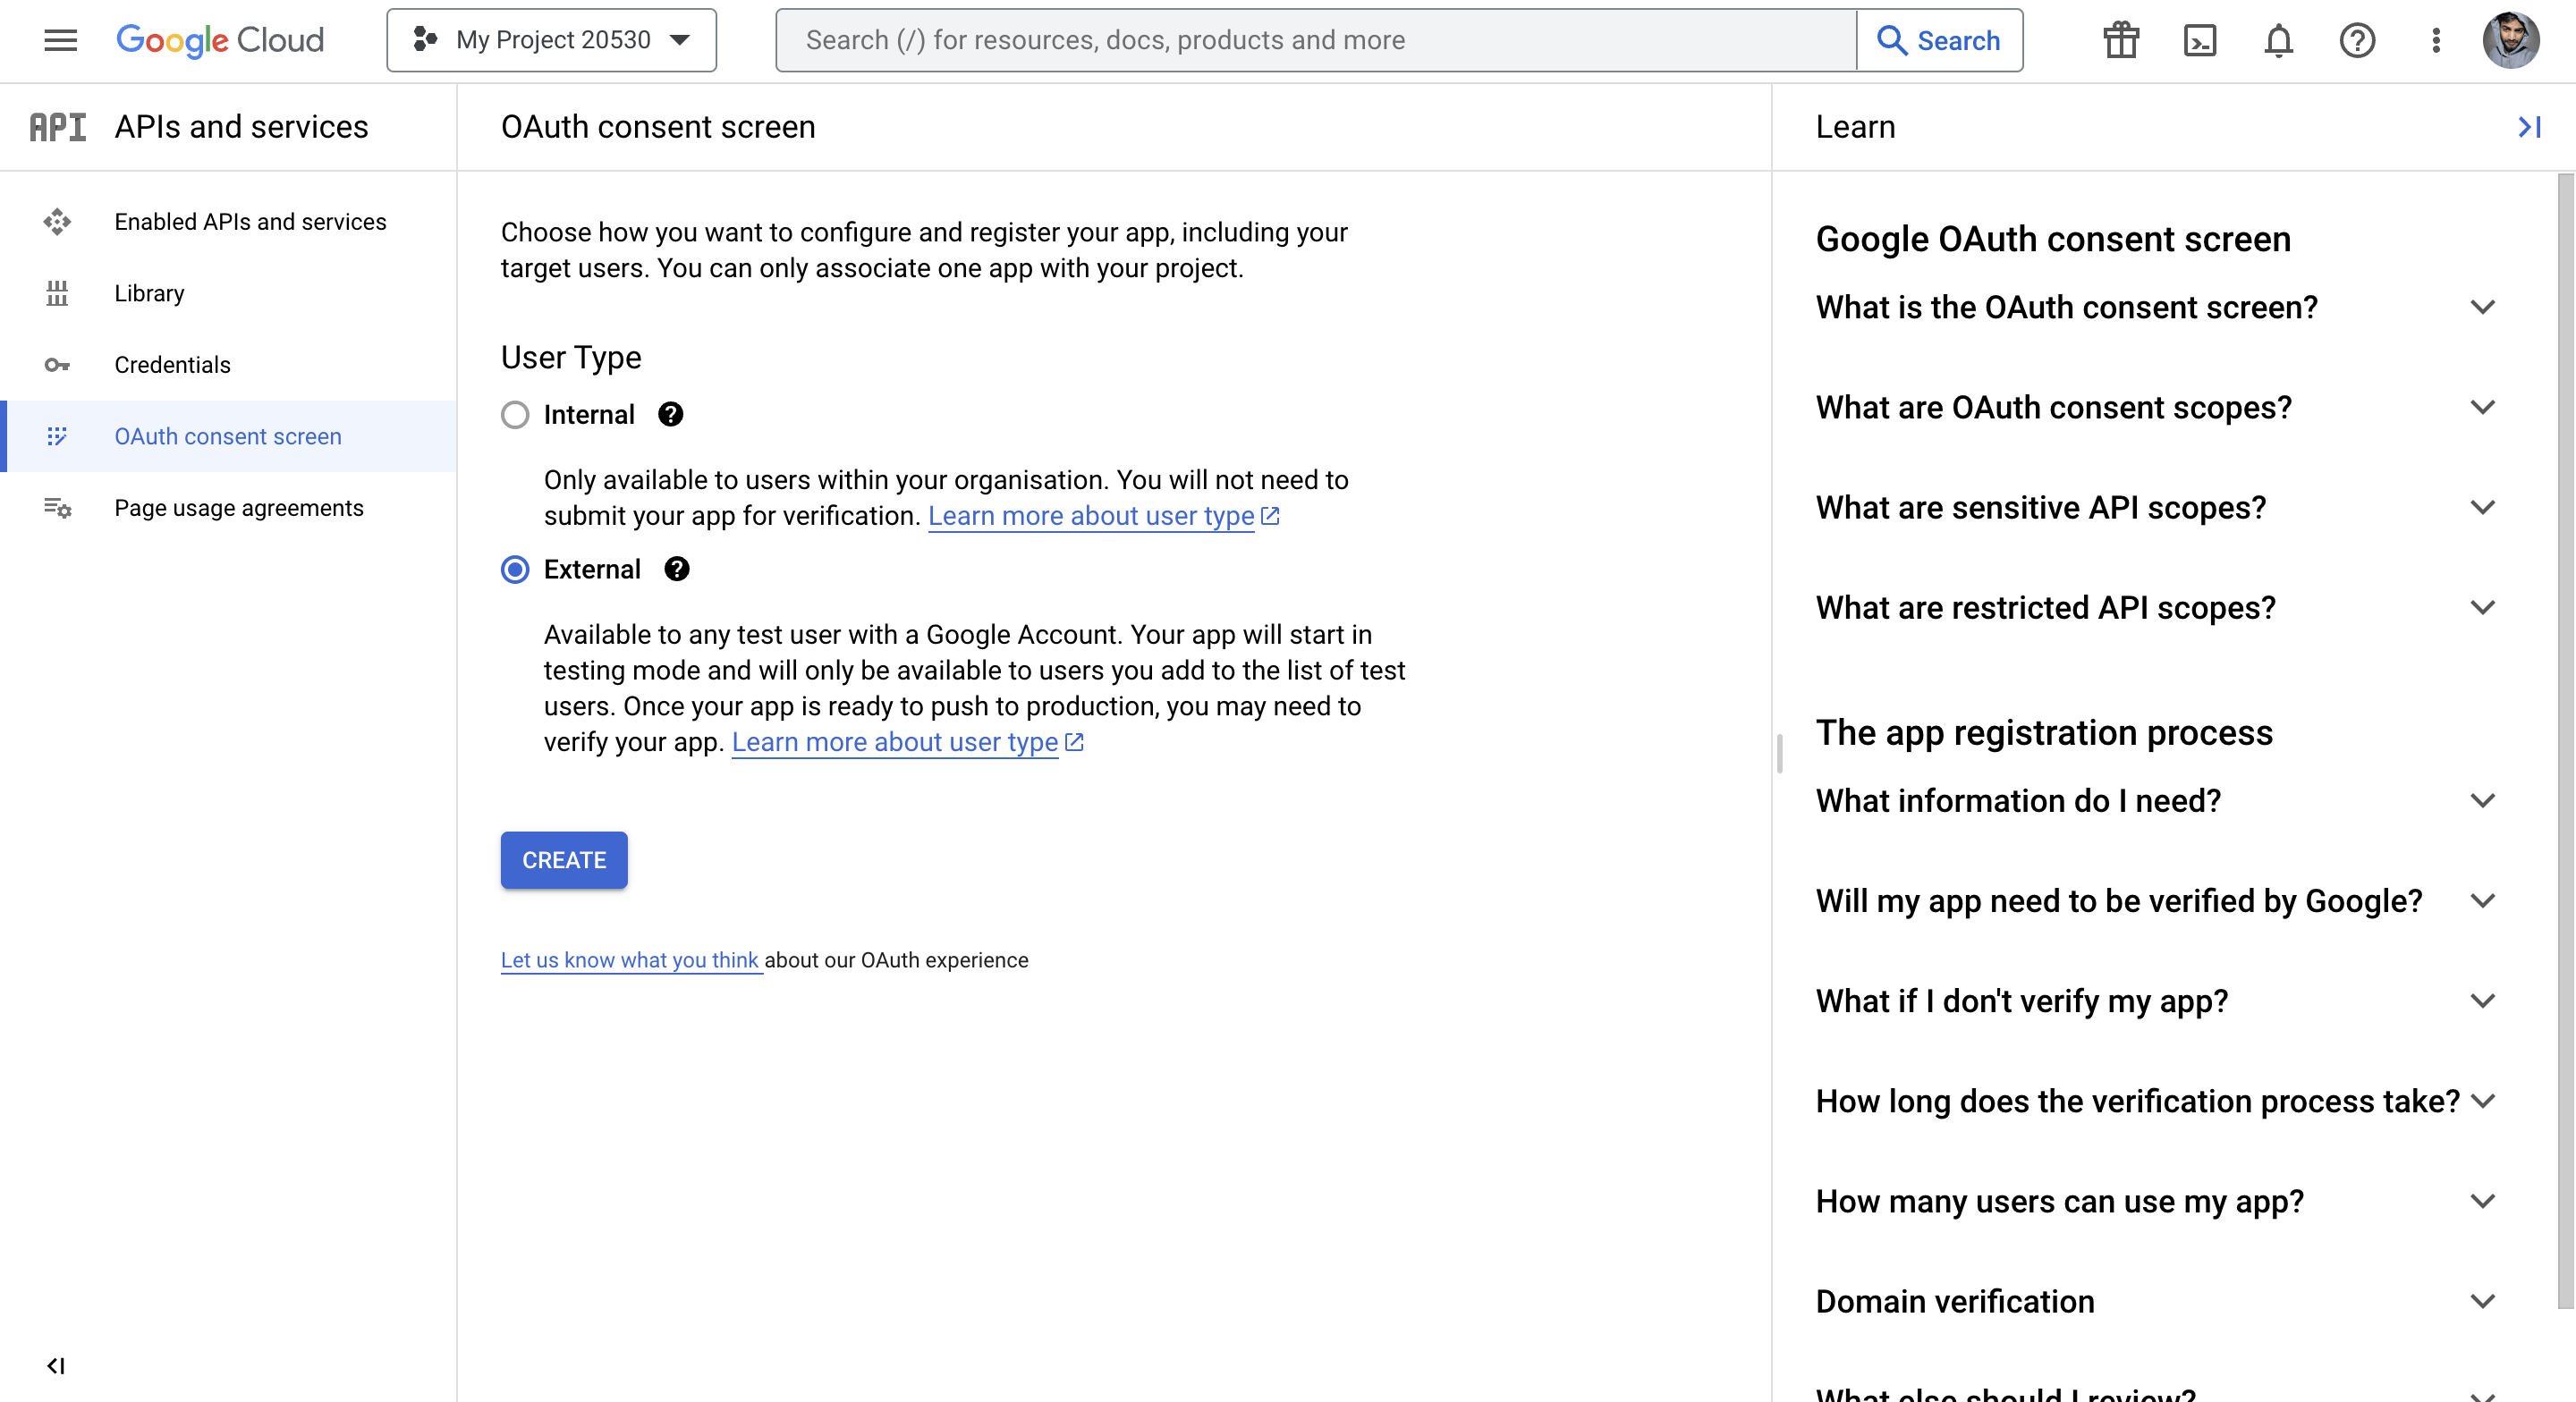
And then you have to go to credentials. Create new credentials.

Select Web application for the Application type.
Then, add:
http://127.0.0.1:8000under Authorised JavaScript originshttp://127.0.0.1:8000/accounts/google/login/callback/under the Authorised redirect URIs
As shown in the screenshot below.

After a successful OAuth client ID creation, copy Your Client ID and Your Client Secret key
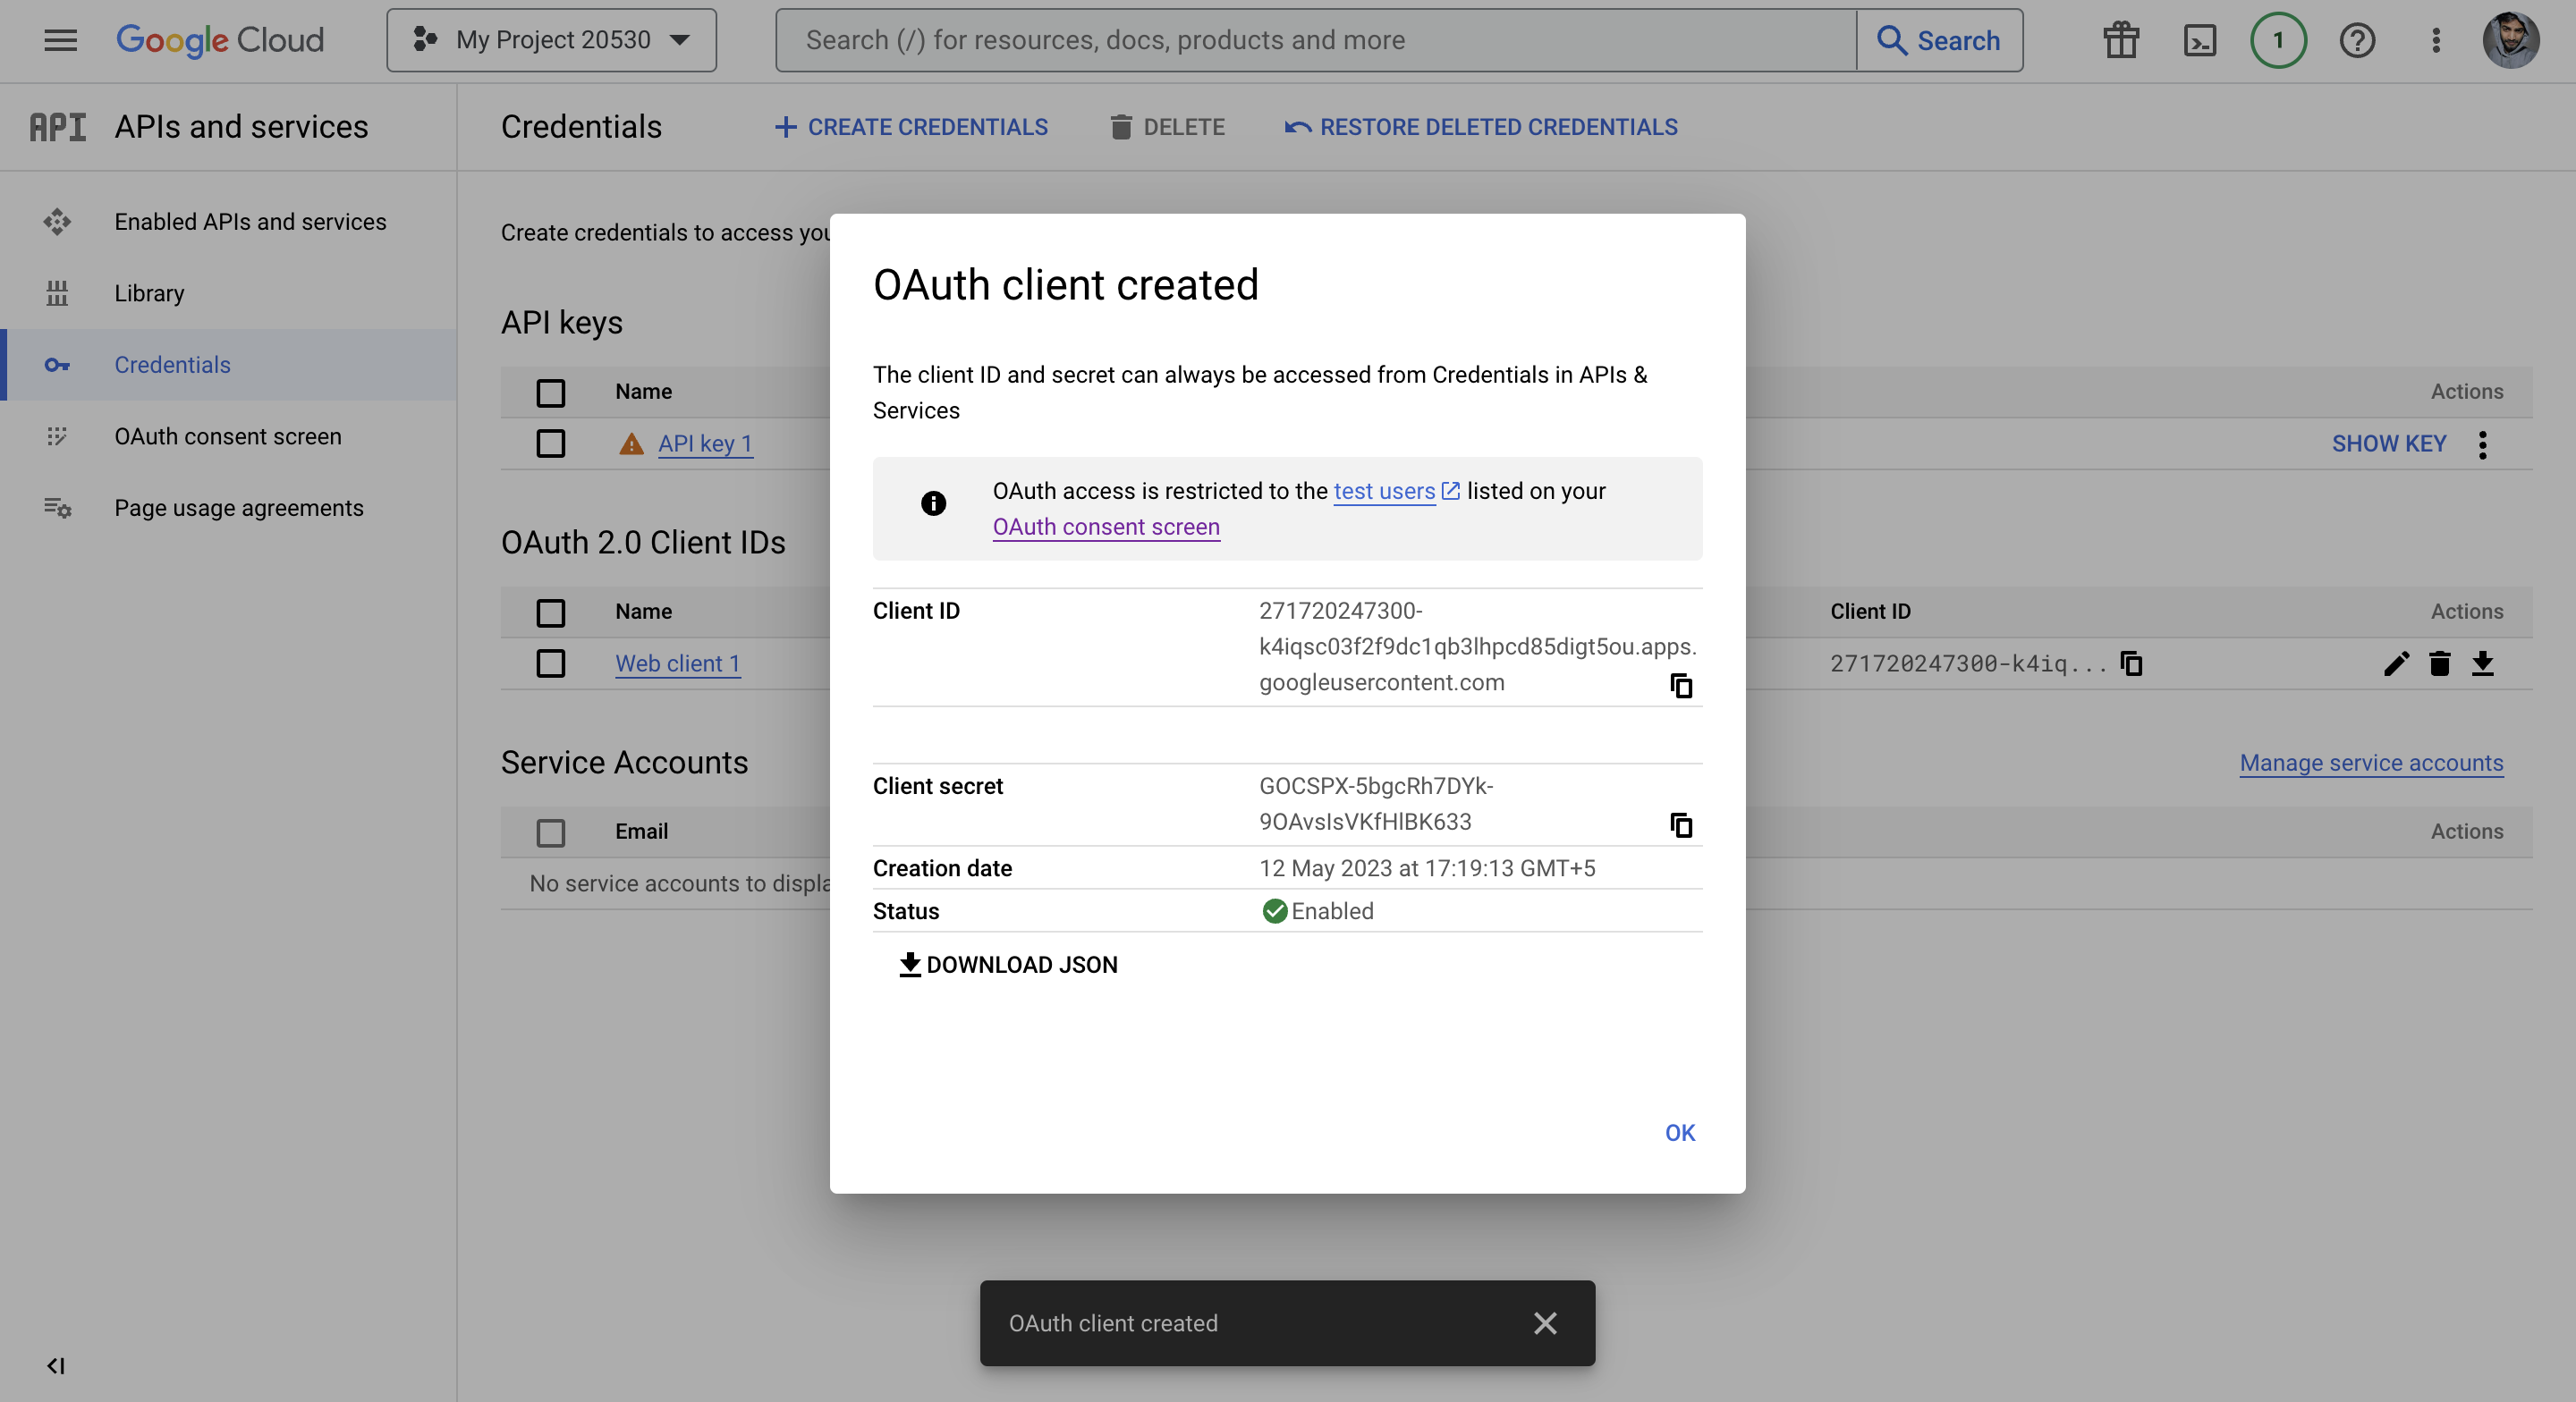
You copy the client ID and client secret key and go to the admin site and paste them.

You have to add something like this:

Save it.
Other
- Facebook: https://developers.facebook.com/apps/
- GitHub: https://github.com/settings/applications
- Twitter: https://developer.twitter.com/en/portal/projects/
Create a client ID and client secret key same as the above methods and add it to the social application Section in the Admin Panel.
Step 10: Add functionality to the given button
For this, we just have to load {% load socialaccount %} And add the button inside the form:
<!-- Load it from the start of block content  -->

{% load socialaccount %}


<form class="d-inline" action="{% provider_login_url 'google' %}" method="post">
    {% csrf_token %}
    <button type="submit" class="btn btn-dark btn-floating mx-1">
        <i class="fab fa-google"></i>
    </button>
</form>
This code loads the socialaccount template tags and defines a form that allows the user to log in using their Google account. The form uses the {% provider_login_url 'google' %} template tag to generate the URL that the form should submit to in order to initiate the login process with Google. The {% csrf_token %} template tag is used to include a security token in the form to protect against cross-site request forgery attacks. The button is styled using Bootstrap classes and includes the Google logo provided by the Font Awesome library.
Our full login template will look something like this, Similarly, you have to add in signup.html template:
login.html
{% extends "home.html" %}
{% load static %}

{% block content %}
{% load socialaccount %}


<div class="row">
    <div class="col-4"></div>
    <div class="col-4 mt-4 card">
        <h3 style="font-family: Georgia, serif; font-size: 40px;" class="text-center my-5">Login Page</h3>
        <form action="" method="post" novalidate>
          {% csrf_token %}
          {% for fm in form %}
           <div class="form-group mb-2">
           {{fm.label_tag}} {{fm}} <small class="text-warning">{{fm.errors|striptags}}</small>
           </div>
          {% endfor %}
          {% if form.non_field_errors %}
          {% for error in form.non_field_errors %}
          <p class="alert alert-danger my-3">{{error}}</p>
          {% endfor %}
          {% endif %}
          <button type="submit" class="btn btn-dark btn-block mt-4">login</button>
         </form>

         <!-- Register buttons -->
        <div class="text-center mt-4 mb-4">
            <p>Not a member? <a class="text-dark" href="{% url 'signup' %}"><b>Register</b></a></p>
            <p>or sign up with:</p>
            </form>

            <form class="d-inline" action="{% provider_login_url 'facebook' %}" method="post">
                {% csrf_token %}
            <button type="submit" class="btn btn-dark btn-floating mx-1">
            <i class="fab fa-facebook-f"></i>
            </button>
            </form>

            <form class="d-inline" action="{% provider_login_url 'google' %}" method="post">
                {% csrf_token %}
            <button type="submit" class="btn btn-dark btn-floating mx-1">
            <i class="fab fa-google"></i>
            </button>
            </form>

            <form class="d-inline" action="{% provider_login_url 'twitter' %}" method="post">
                {% csrf_token %}
            <button type="button" class="btn btn-dark btn-floating mx-1">
            <i class="fab fa-twitter"></i>
            </button>
            </form>

            <form class="d-inline" action="{% provider_login_url 'github' %}" method="post">
                {% csrf_token %}
            <button type="submit" class="btn btn-dark btn-floating mx-1">
            <i class="fab fa-github"></i>
            </button>
            </form>
        </div>
    </div>
    <div class="col-4"></div>
</div>

{% endblock content %}
Now our project is ready, If you have any problem then you can message me Abdulla Fajal.
Grab the code on GitHub Django Allauth.
Conclusion
In this tutorial, we went through the step-by-step process of integrating social login using Django Allauth. We configured Django Allauth, added social providers, configured URLs, templates, and tested the implementation. Now, you can easily add social authentication to your Django project and allow users to log in with their social accounts.