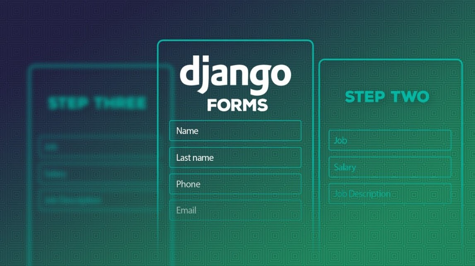

Multi-step forms can improve the user experience and make it easier for users to provide complex information in a structured manner. Django, a popular Python web framework, provides various tools and libraries that make it easy to build multi-step forms. In this guide, we will explore the process of building multi-step forms with Django and provide examples along the way.
Step 1: Setting up a Django project and application
To get started, we need to create a Django project and application. If you have Django installed, you can create a new project with the following command:
django-admin startproject project_name
This will create a new project with the name "project_name". Next, we need to create a Django application within the project. We can do this with the following command:
python manage.py startapp app_name
This will create a new application with the name "app_name". We can now begin building our multi-step form within the application.
Step 2: Defining the form fields
The first step in building a multi-step form is to define the fields that will be used in the form. In Django, we can define a form using a class that extends the forms.Form class. Here's an example of a simple form that contains two fields: name and email.
from django import forms

class BasicForm(forms.Form):
    name = forms.CharField(max_length=100)
    email = forms.EmailField()
In this example, we're using the CharField and EmailField classes to define our form fields. The max_length parameter specifies the maximum length of the name field. We can now use this form to collect basic information from the user.
Step 3: Defining the form templates
Next, we need to define the templates that will be used to render our form. In Django, we can define templates using the Django template language. Here's an example of a simple template that renders our basic form:
{% extends 'base.html' %}

{% block content %}
  <form method="post">
    {% csrf_token %}
    {{ form.as_p }}
    <button type="submit">Submit</button>
  </form>
{% endblock %}
In this example, we're using the form variable to render our form fields. The as_p method is used to render the form fields as paragraphs, making it easy to style the form with CSS. We're also including a CSRF token to protect against Cross-Site Request Forgery attacks.
Step 4: Splitting the form into multiple steps
Now that we have a basic form and template, we can begin splitting the form into multiple steps. One way to do this is to use Django's Form Wizard. The Form Wizard allows us to split a form into multiple steps and handle each step individually. Here's an example of how we can use the Form Wizard to split our form into two steps:
from django.forms import Form
from django.forms import formset_factory
from django.forms.models import BaseModelFormSet
from django.shortcuts import render
from django.urls import reverse_lazy
from django.views.generic.edit import FormView

class StepOneForm(Form):
    name = forms.CharField(max_length=100)

class StepTwoForm(Form):
    email = forms.EmailField()

class MultiStepFormView(FormView):
    template_name = 'multi_step_form.html'
    form_class = StepOneForm
    success_url = reverse_lazy('home')

    def get_form(self, form_class=None):
        return self.form_class(**self.get_form_kwargs())

    def get_form_class(self):
        return self.form_class

    def get_context_data(self, **kwargs):
                context = super().get_context_data(**kwargs)
        if 'form' not in context:
            context['form'] = self.get_form()
        return context

    def render_to_response(self, context, **response_kwargs):
        step = int(self.request.GET.get('step', 1))
        if step == 1:
            self.form_class = StepOneForm
        elif step == 2:
            self.form_class = StepTwoForm
        return super().render_to_response(context, **response_kwargs)

    def done(self, form_list, **kwargs):
        return render(self.request, 'done.html', {'form_data': [form.cleaned_data for form in form_list]})
In this example, we're defining two forms: StepOneForm and StepTwoForm. We're also creating a new view called MultiStepFormView that extends the FormView class. In the MultiStepFormView, we're defining the template_name, form_class, and success_url attributes. We're also defining the get_form, get_form_class, get_context_data, render_to_response, and done methods.
The get_form method is used to get the current form instance based on the current step. The get_form_class method is used to get the current form class based on the current step. The get_context_data method is used to add the current form instance to the context. The render_to_response method is used to render the current form based on the current step. The done method is called when the form has been successfully submitted and all the form data is valid.
In the render_to_response method, we're using the self.request.GET.get('step', 1) to get the current step number from the query string. If the step number is 1, we're using the StepOneForm. If the step number is 2, we're using the StepTwoForm.
Finally, in the done method, we're rendering a new template called done.html and passing the form data as context.
Step 5: Defining the form templates for each step
Now that we have our view and forms defined, we need to define the templates for each step. Here's an example of how we can define the templates for each step:
{% extends 'base.html' %}

{% block content %}
  <h1>Step {{ wizard.steps.step1 }} of {{ wizard.steps.count }}</h1>
  <form method="post">
    {% csrf_token %}
    {{ wizard.form.as_p }}
    <button type="submit">Next</button>
  </form>
{% endblock %}
In this example, we're using the wizard variable to access the current step and total number of steps. We're also using the wizard.form variable to render the current form. We're including a Next button that will submit the current form and move to the next step.
Step 6: Adding validation and error handling
Now that we have our forms and templates defined, we need to add validation and error handling. In Django, we can define validation and error handling in the form classes. Here's an example of how we can add validation and error handling to our StepOneForm:
class StepOneForm(Form):
    name = forms.CharField(max_length=100)

    def clean(self):
        cleaned_data = super().clean()
        name = cleaned_data.get('name')

        if name == 'admin':
            raise forms.ValidationError('Admin name is not allowed')
In this example, we're defining a clean method that validates the form data. We're using the super().clean() method to get the cleaned data dictionary. We're then getting the value of the name field and checking if it's equal to admin. If it is, we're raising a ValidationError with message that says "Admin name is not allowed".
We can also define error messages for specific fields by adding a clean_<fieldname> method to the form. Here's an example of how we can add a custom error message for the name field:
class StepOneForm(Form):
    name = forms.CharField(max_length=100)

    def clean_name(self):
        name = self.cleaned_data.get('name')

        if len(name) < 3:
            raise forms.ValidationError('Name must be at least 3 characters long')

        return name
In this example, we're defining a clean_name method that validates the name field. We're using the cleaned_data dictionary to get the value of the name field. We're then checking if the length of the name is less than 3 characters. If it is, we're raising a ValidationError with a message that says "Name must be at least 3 characters long".
Step 7: Running the application
Now that we have our multi-step form defined, we can run our application and test it out. To run the application, open a command prompt or terminal window and navigate to the directory where you've stored your project. Then, run the following command:
python manage.py runserver
This will start the Django development server and you'll be able to access the application in your web browser at http://localhost:8000/.
Conclusion
In this comprehensive guide, we've covered how to build multi-step forms in Django. We started by defining our forms, then creating a view that handles multiple steps, and finally defining templates for each step. We also covered how to add validation and error handling to our forms.
By following these steps, you can easily create multi-step forms that are easy to use and provide a great user experience for your visitors.