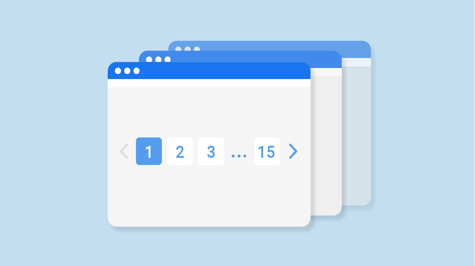
Pagination is a common requirement when dealing with large datasets in web applications. It allows users to navigate through a set of data by dividing it into manageable chunks or pages. In this article, we'll explore how to implement pagination in Django, a powerful Python web framework.
Prerequisites
Before we begin, make sure you have Django installed and have a basic understanding of Django project structure, models, views, and templates.
Step 1: Set up your Django project and create a Django app
To get started, create a new Django project using the following command:
django-admin startproject pagination_project
Then, navigate to the project directory:
cd pagination_project
Create a Django app within your project:
python manage.py startapp pagination_app
Step 2: Define a model for the data you want to paginate
In the pagination_app/models.py file, define your model. For this example, let's create a simple Post model with a title and content:
from django.db import models

class Post(models.Model):
    title = models.CharField(max_length=100)
    content = models.TextField()

    def __str__(self):
        return self.title
Step 3: Run migrations to create the necessary database tables
To create the required database tables for your models, run the following commands:
python manage.py makemigrations
python manage.py migrate
Step 4: Populate your database with sample data
To test our pagination implementation, let's populate the database with some sample data. Open the Django shell using the command:
python manage.py shell
Inside the shell, import your model and create a few instances of the Post model:
from pagination_app.models import Post

Post.objects.create(title='Post 1', content='Content for Post 1')
Post.objects.create(title='Post 2', content='Content for Post 2')
Post.objects.create(title='Post 3', content='Content for Post 3')
# Add more sample data if needed
Step 5: Create a Django view to retrieve the paginated data
Open the pagination_app/views.py file and create a view function named post_list that retrieves the data to be paginated from the database. We'll use Django's Paginator class for pagination:
from django.core.paginator import Paginator
from django.shortcuts import render
from .models import Post

def post_list(request):
    posts = Post.objects.all()
    paginator = Paginator(posts, 2)  # Show 2 posts per page

    page_number = request.GET.get('page')
    page_obj = paginator.get_page(page_number)

    return render(request, 'pagination_app/post_list.html', {'page_obj': page_obj})
Step 6: Implement pagination logic using Django's Paginator class
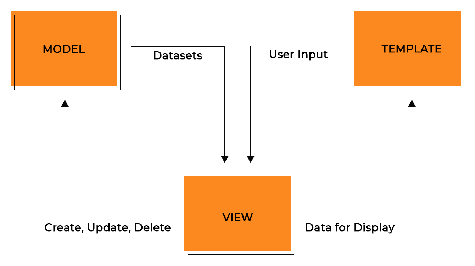
In the post_list view, we create a Paginator object by passing in the queryset (posts) and the number of items to display per page (2 in this example). We also get the current page number from the request's GET parameters (request.GET.get('page')) and use it to get the appropriate page object using the get_page() method of the paginator.
Step 7: Pass the paginated data to the template
Create a directory named templates within the pagination_app directory. Inside the templates directory, create another directory called pagination_app. Then, create a file named post_list.html inside the pagination_app directory. Open the post_list.html file and add the following code:
{% for post in page_obj %}
<h2>{{ post.title }}</h2>
<p>{{ post.content }}</p>
{% endfor %}
<div class="pagination">
<span class="step-links">
{% if page_obj.has_previous %}
<a href="?page=1">« first</a>
<a href="?page={{ page_obj.previous_page_number }}">previous</a>
{% endif %}
<span class="current-page">{{ page_obj.number }}</span>
{% if page_obj.has_next %}
<a href="?page={{ page_obj.next_page_number }}">next</a>
<a href="?page={{ page_obj.paginator.num_pages }}">last »</a>
{% endif %}
</span>
</div>
Step 8: Create a template to display the paginated data
In the above code, we loop through the page_obj to display each post's title and content. We also check for the existence of previous and next pages to display the appropriate navigation links.
Step 9: Add navigation links to allow users to switch between pages
In the template code, we create navigation links by checking if the page has a previous or next page using page_obj.has_previous and page_obj.has_next. We generate the URLs for the previous and next pages using ?page={{ page_obj.previous_page_number }} and ?page={{ page_obj.next_page_number }}. Additionally, we provide links to the first and last page using ?page=1 and ?page={{ page_obj.paginator.num_pages }}.
Step 10: Update the view to handle page requests
In the post_list view, we retrieve the current page number from the request's GET parameters (request.GET.get('page')). We use the get_page() method of the paginator to get the appropriate page object based on the page number. Finally, we pass the page object (page_obj) to the template for rendering.
Conclusion
Congratulations! You have successfully implemented pagination in Django. By following this step-by-step guide and example, you can now paginate data in your Django web applications, allowing users to navigate through large datasets easily. Feel free to customize the pagination logic and appearance according to your specific requirements.
Remember to run your Django development server (python manage.py runserver) and navigate to the appropriate URL to see the paginated data and navigation links in action.


