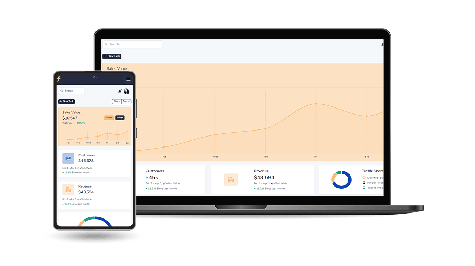
Django provides a built-in administration site that makes it easy to manage the data in your application. The admin site is highly customizable and can be tailored to fit the specific needs of your application. In this tutorial, we will walk through the process of customizing the Django admin site step-by-step with examples. Let’s start.
Step 1: Creating a Django Project
Before customizing the Django admin site, we need to create a Django project. You can skip this step if you already have a Django project.
To create a new Django project, open up a terminal or command prompt and run the following command:
django-admin startproject myproject
This will create a new directory called "myproject" with the basic structure of a Django project.
Step 2: Creating a Django App
Next, we need to create a Django app containing the models we want to manage on the admin site. To create a new app, navigate to the project directory and run the following command:
python manage.py startapp myapp
This will create a new directory called "myapp" with the basic structure of a Django app.
Step 3: Creating Models
Now that we have our app set up, we can create some models to manage on the admin site. In this example, we will create a simple model for a blog post. Open up the "models.py" file in your app directory and add the following code:
from django.db import models

class Post(models.Model):
    title = models.CharField(max_length=255)
    body = models.TextField()
    pub_date = models.DateTimeField(auto_now_add=True)

    def __str__(self):
        return self.title
This creates a basic model for a blog post with a title, body, and publication date.
Step 4: Registering Models with the Admin Site
Now that we have our models set up, we need to register them with the admin site. To do this, open up the "admin.py" file in your app directory and add the following code:
from django.contrib import admin
from .models import Post

admin.site.register(Post)
This registers the Post model with the admin site, which will allow us to manage Post objects through the admin interface.
Step 5: Customizing the Admin Site Header
One of the simplest ways to customize the admin site is to change the header text. By default, the header text is set to "Django Administration". To change this, we can create a new file called "admin.py" in our project directory and add the following code:
from django.contrib import admin

admin.site.site_header = "My Custom Admin Site Header"
This will change the header text to "My Custom Admin Site Header".
Step 6: Customizing the Admin Site Title
In addition to the header text, we can also customize the admin site title. By default, the title is set to "Django site admin". To change this, we can add the following code to the "admin.py" file in our project directory:
from django.contrib import admin

admin.site.site_title = "My Custom Admin Site Title"
This will change the title to "My Custom Admin Site Title".
Step 7: Customizing the Admin Site Index Page
The index page of the admin site displays a list of all the models that have been registered with the site. We can customize this page by creating a new template called "index.html" in our app directory. In this template, we can add any custom HTML, CSS, or JavaScript code that we want to include.
To create the "index.html" template, create a new directory called "templates" in your app directory, and then create another directory called "admin" inside the "templates" directory. Finally, create a new file called "index.html" inside the "admin" directory.
Inside the "index.html" file, we can add any custom HTML, CSS, or JavaScript that we want to include on the index page. For example, we might want to add a custom logo to the page. Here's an example of how we can add a logo to the index page:
{% extends "admin/base_site.html" %}

{% block branding %}
<h1 id="site-name"><img src="/static/images/logo.png"> My Site Name</h1>
{% endblock %}

{% block content %}
{{ block.super }}
{% endblock %}
This code extends the base "base_site.html" template provided by Django and overrides the "branding" block to add a custom logo and site name to the page.
Step 8: Customizing the Model Form
When we create a new object in the admin site, Django uses a default form to collect the data. We can customize this form by creating a new form class and registering it with the model admin.
To create a new form class, we can add the following code to our app's "admin.py" file:
from django import forms
from .models import Post
from django.contrib import admin

class PostAdminForm(forms.ModelForm):
    class Meta:
        model = Post
        fields = '__all__'

    body = forms.CharField(widget=forms.Textarea)

class PostAdmin(admin.ModelAdmin):
    form = PostAdminForm

admin.site.register(Post, PostAdmin)
This code defines a new form class called "PostAdminForm" that inherits from Django's built-in "ModelForm" class. We can customize the form by defining the fields we want to include and specifying any custom widgets we want to use.
We then create a new model admin class called "PostAdmin" and set its "form" attribute to our new form class. Finally, we register the Post model with our new "PostAdmin" class instead of the default model admin class.
Step 9: Customizing the Model List Display
By default, the list of objects in the admin site displays only the object's string representation. We can customize this display by creating a new method on the model admin class that returns a custom string.
To do this, we can add the following code to our app's "admin.py" file:
from django.contrib import admin
from .models import Post

class PostAdmin(admin.ModelAdmin):
    list_display = ('title', 'pub_date', 'custom_body')

    def custom_body(self, obj):
        return obj.body[:50]

    custom_body.short_description = 'Custom Body'

admin.site.register(Post, PostAdmin)
This code sets the "list_display" attribute of our "PostAdmin" class to include the "title", "pub_date", and "custom_body" fields. We also define a new method called "custom_body" that returns the first 50 characters of the post's body text. We then set the "short_description" attribute of this method to "Custom Body" so that it appears as the column header on the admin site.
Step 10: Customizing the Model Detail View
When we view the details of a single object in the admin site, Django uses a default template to display the data. We can customize this template by creating a new template called "change_form.html" in our app's "templates/admin/" directory.
To create the "change form.html" template, we can copy the default template from Django's source code and modify it as needed. Here's an example of how we can add a custom field to the detail view:
{% extends "admin/change_form.html" %}

{% block extrahead %}
{{ block.super }}
<script type="text/javascript">
    // Custom JavaScript code goes here
</script>
{% endblock %}

{% block content %}
{{ block.super }}
{% if not is_popup %}
<div class="custom-field">
    <label for="id_custom_field">Custom Field:</label>
    {{ form.custom_field }}
</div>
{% endif %}
{% endblock %}
This code extends the default "change_form.html" template and adds a new "extrahead" block where we can include any custom JavaScript code that we want to use on the page.
We then override the "content" block to add a custom field to the form. In this example, we've added a new "custom-field" div that includes a label for our custom field and the field itself.
We've also included an "if" statement to make sure that the custom field is only displayed if we're not in a popup window.
Step 11: Customizing the Model Delete View
By default, the admin site displays a confirmation page when we delete an object. We can customize this page by creating a new template called "delete_confirmation.html" in our app's "templates/admin/" directory.
To create the "delete_confirmation.html" template, we can copy the default template from Django's source code and modify it as needed. Here's an example of how we can add a custom message to the confirmation page:
{% extends "admin/delete_confirmation.html" %}

{% block content %}
{{ block.super }}
<p>Are you sure you want to delete "{{ object }}"? This action cannot be undone.</p>
{% endblock %}
This code extends the default "delete_confirmation.html" template and overrides the "content" block to add a custom message. In this example, we've added a new "p" element that displays a custom message to the user.
Step 12: Customizing the Model Admin URLs
By default, the admin site uses a URL pattern that includes the app name and model name. We can customize this URL pattern by adding a new "get_urls" method to our model admin class.
To do this, we can add the following code to our app's "admin.py" file:
from django.urls import path
from django.contrib import admin
from .views import custom_view
from .models import Post

class PostAdmin(admin.ModelAdmin):
    def get_urls(self):
        urls = super().get_urls()
        custom_urls = [
            path('custom_view/', self.admin_site.admin_view(custom_view), name='custom_view'),
        ]
        return custom_urls + urls

admin.site.register(Post, PostAdmin)
This code defines a new "get_urls" method on our "PostAdmin" class that returns a list of custom URL patterns. In this example, we've added a new URL pattern for a custom view called "custom_view".
We then use the "admin_site.admin_view" method to wrap our custom view function and register it with the admin site using the "name" attribute.
Finally, we return the custom URL patterns along with the default URL patterns using the "super().get_urls()" method.
Conclusion
Customizing the admin site in Django allows us to create a more personalized and streamlined experience for our users. By following the steps outlined in this tutorial, we can customize the admin site in a variety of ways, including:
- Adding custom fields to the model form
- Customizing the list display
- Adding custom actions to the model list view
- Customizing the detail view of a model instance
- Customizing the delete confirmation page
- Customizing the model admin URLs
By leveraging the built-in tools provided by Django, such as model admin classes and templates, we can create a customized admin interface that meets the specific needs of our project.
It's important to note that while customizing the admin site can be a powerful tool, we should always prioritize the user experience and ensure that any changes we make are intuitive and easy to use.
Additionally, it's a good practice to test any customizations thoroughly to ensure that they are compatible with future versions of Django and any other third-party packages that we may be using.
With the steps outlined in this tutorial as a starting point, we can continue to explore and experiment with customizing the admin site in Django to create a seamless and efficient user experience for our projects.
